Category: science projects

Fruit - Polishing Pennies (Weekly Unplugged Project)

By , September 29, 2008 3:53 am

This week’s Unplugged Project theme was fruit. We tried a really cool fruit project that was less than successful. I would have posted about our failure, except that I KNOW it can succeed since I did it successfully as a child. It needs a bit more fiddling (so we’ll keep working and post when it is perfected).

Instead I’ll post about a fruit science project from our book 730 Easy Science Experiments: With Everyday Materials. My oldest daughter found this in the book last week and for some reason was desperate to do it: polishing pennies. (I reviewed this book here if you want to know more.)

The idea is to show how lemon juice (very acidic) can clean the oxidization off a grungy old penny. If you live outside the US, any copper coin will work for this.

We ratcheted this one up. I had always heard that Coca Cola was acidic enough to strip enamel off teeth and polish stainless steel sinks, so a comparison test seemed in order. I had a Coke in the fridge from leftover guests so we gave it a go.

I was hoping that the Coke might perform up to the standard of the lemon juice and prove once and for all that it is BAD for your teeth.

Here are the ingredients:

Squeeze the lemon (pretty fun):

Put some lemon juice (and some Coke-if you choose to try the comparison experiment) into separate bowls and drop pennies into each bowl:

Leave them for 15 or 20 minutes then remove and compare:

We probably should have kept a “control penny” for comparison (actually, you can see the originals in the “ingredients” photo) but trust me, the lemon juice pennies were like new! The Coke pennies only slightly shinier. So much for my anti-Coke campaign.

++++++++

What did you do this week for fruit? If you joined in this week’s fruit project, then please leave a link to your project in Mr. Linky below. If you want to learn how to join in the Unplugged Project, then please read more here.

++++++++

Next week’s Unplugged Project theme will be:

White

Enjoy!

Molecules in Motion (“730 Easy Science Experiments” - Book Review)

By , September 22, 2008 10:45 pm

I must admit, my heart sank when my sister gave my kids the book 730 Easy Science Experiments: With Everyday Materials by E. Richard Churchill, Louis V. Loesching, and Muriel Mandell.

This confession will certainly earn me yet another “Mom of the Year Award,” but here it is:

Was my first thought: “730?? Oh hooray! Think of all the wonderful projects and what we will learn together!!” Noooo…. My first thought was: “730?? Who is going to have to do those 730 science experiments with them?? Oh no!”

My childless sister seemed to pick up on my silent consternation and left with a sadistic smile (or so I thought) and the parting words of: “Have fun!”

Well actually, we are having fun. The book sat on a shelf for a while until my 8 year-old daughter recently rediscovered it.

On Sunday, when I was planning a “Fun With Mom Day,” she showed me some experiments that she wanted to do. Since we were going to have Fun With Mom no matter what, I was willing to assist in any and all experiments. We did several. The one I will share with you today involved the motion of molecules.

This sounds fancy, but actually, like most of the experiments in this very thorough (did I tell you already that there are 730 experiments?) volume, this experiment involved only items we had on hand here in the house.

You need food coloring, two clear glasses, and hot and cold water. Put hot water in one glass (I used very hot tap water) and cold water in the other (I used super-cooled water from our refrigerator water dispenser).

Put just one drop of food coloring in each glass and watch what happens. The molecules are moving faster in hot water so the food coloring blends with the water very, very quickly. In the slower-moving cold water glass, the food coloring barely moves at all. In fact it makes some beautiful slow-motion droplet shapes that reminded me of a lava lamp.

This glass was the hot water:

And this one was cold (see the “lava lamp?”):

This was just one of 730 experiments. That means I have another 729 to inflict on you all!!

Seriously, I do like this book. As I mentioned earlier, the ingredients are mostly household items, or are easily obtainable: no enriched uranium needed here.

The experiments vary in complexity from ridiculously simple yet not boring for young ones (Straw Wheels - moving a heavy book more easily using drinking straws as rollers - p.23) to more complicated yet still easily doable (Seeing Sound Waves p.110 or Balloon Barometer p.249).

The chapters are interesting and fun: Clutching at Straws; Paper Capers; More Than Lemonade; Dairy Dozen; Adventures With a String; Soap Suds; Slow Start-Fast Finish; Keeping Your Balance; How to Have All the Moves; The Sound of Science; Feeling Stressed? Try Some Surface Tension; Science Can Give You a Warm Feeling; Blown Away; Being Earth Conscious; World Travellers; Leafy Lessons; Dirty Words: Soil, Sand, Humus, and Mud; Gravity and Magnetism: Attractive Forces; Don’t Fiddle With Old Fossils; Weather; Whirling Winds and Gentle Breezes; Water, Water, Everywhere; Building a Weather Station; Air, H2O, and Other Things; Here’s Superman, But Where’s Clark?; Salty Solutions and Sweet Success

Each experiment has a “What to do,” a “What Happens,” and most importantly, a “Why” section.

You’ll be seeing more experiments from us I am sure. Remember, we still have 729 of them to show you!

Soft - Moth & Butterfly Feeders (Weekly Unplugged Project)

By , September 7, 2008 6:34 pm

The theme for this week’s Unplugged Project was soft.

I guess we could also have done this one last week for insect, but this week for our soft Unplugged Project, we made moth and butterfly feeders out of soft cotton balls and soft sponges.

I was inspired by our second visit this past summer to the Strong Museum of Play’s Butterfly Garden (in Rochester, NY). By the way, if anyone lives near Rochester, NY, or is visiting the area, that museum is well worth a visit, and don’t miss the butterflies! (For photos, please see my post from our first visit in 2007).

++++++++

Let’s start with the moths. I found the instructions here: How Stuff Works: Moth Feeder.

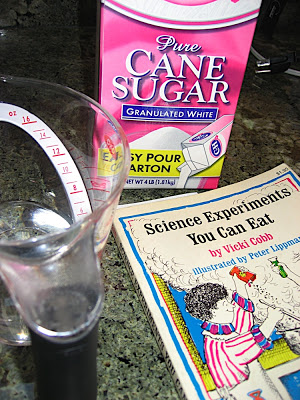
You need cotton balls, string, apple juice and sugar:

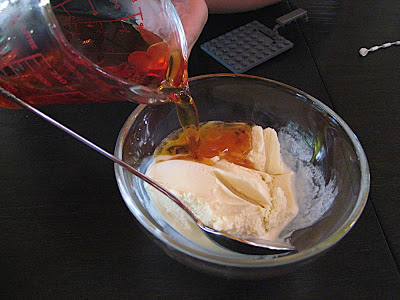
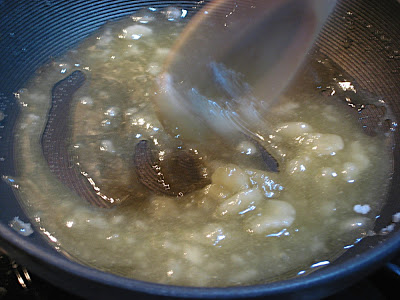
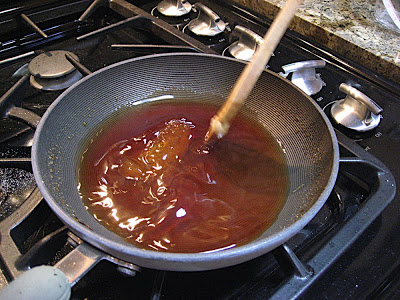
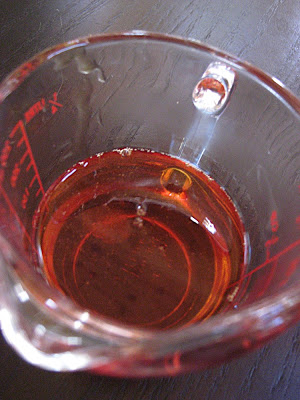
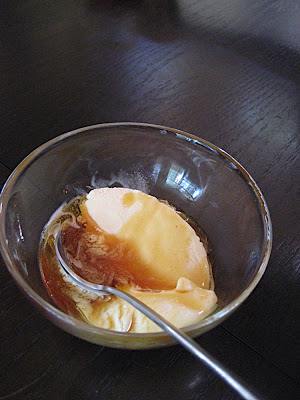
Measure 1/2 cup apple juice and pour it into a bowl:

Stir 1 tablespoon sugar into the apple juice until dissolved:

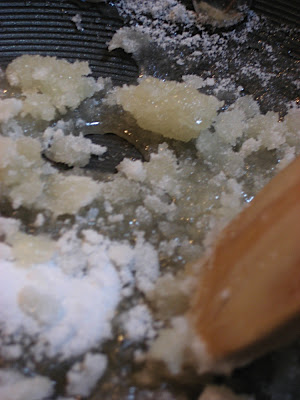
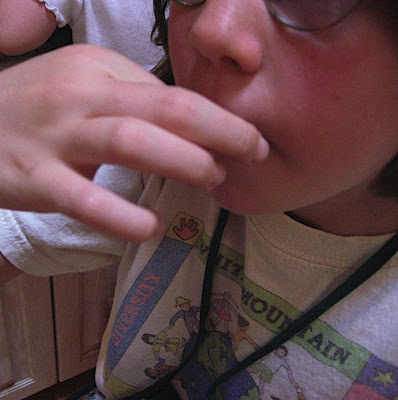
Next, soak the cotton balls in the mixture until saturated, then squeeze out to reduce drips. My two year-old really enjoyed this step. All the children were licking their fingers when done!

Tie the sugary cotton balls onto a string. We tied several on each string.

Hang the strings near outside lights or in front of a window where a light will be on inside, anywhere that might attract moths at night.

++++++++

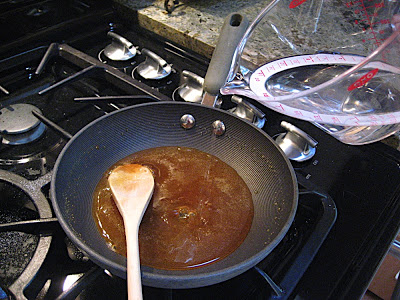
For the butterfly feeder we used the leftover apple juice-sugar mixture from the moth project. We also needed a kitchen sponge, and a plate or dish - preferably red since butterflies are supposed to be attracted to the color red.

The formula for attracting butterflies (or certain moths) seems to be quite varied. Apparently sugar water works fine, but there are all kinds of other ingredients that can enhance the attraction. I even read that human urine has been used successfully to attract them! Generally though, they apparently like fermented bananas or other fruit, sugar water, brown sugar and rum!

We decided to get fancier than plain old sugar water, but we gave the urine idea a miss!

We didn’t have rotten banana on hand, but we did have some over ripe nectarines that I left out in the sun all day to hopefully ferment a bit:

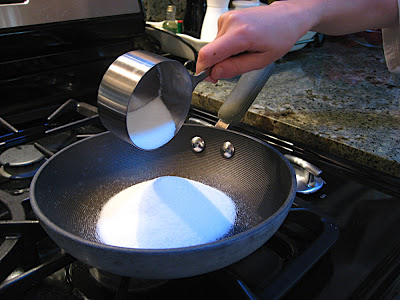
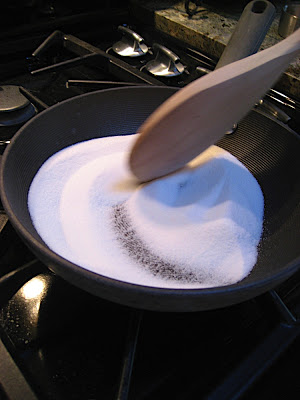
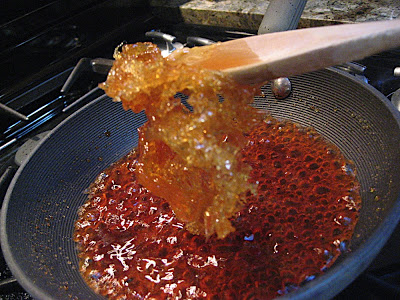
We concocted our own formula of the leftover apple juice and sugar mixture, additional brown sugar, the nectarines, and even a bit of rum that I found in the pantry (although you could certainly leave that out, I think it probably just gives a more fermented odor to the blend).

Soak the sponge in the liquid mixture until saturated, then put it on the plate and add any rotten fruit:

Place the dish outside in a sunny spot. Try to pick someplace near flowers that butterflies enjoy, and put the plate a bit higher than the blooms if you can. We put ours on top of an empty birdbath in the middle of our rather neglected butterfly garden.

++++++++

So, how did we do??

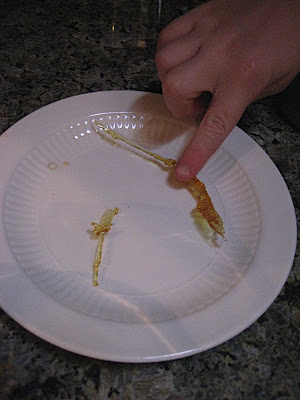
Well, we had one moth customer as of bedtime last night:

We hung three feeders up and (not surprisingly really) he was at the one near the brightest light. Keep that in mind if you try this.

The butterflies were more elusive. We didn’t sit and watch all day, but none came while we were checking. We’ll see what happens tomorrow.

(RESPONSE TO QUESTIONS IN COMMENTS: I expected the plate to attract lots of wasps, ants and other bugs, but not yet for some reason. I suspect that that might happen more readily in some “buggier” parts of the world. Once the ants do find it though, they’ll probably carry the whole thing off!)

+++++++

A few links:

Bird and Other Wildlife Feeders

How to: The Butterfly and Moth Cookbook (cooking FOR them, not cooking them…)

Why are Moths Attracted to Light?

Moth or Butterfly?

The Children’s Garden (an old Unplug Your Kids post about gardening with children, includes information on creating a butterfly garden)

+++++++

If you joined in the soft Unplugged Project this week, then please put a link to your post (preferably your actual post, rather than your blog) in Mr. Linky. If you didn’t join us but want to know more about how to join in, then please read more here.

Also, in case you missed it last week, I have decided to disable the Linkys after two weeks in order to prevent spam. You will always be able to follow all the existing links on the Mr. Linky, but there will be no new links added after two weeks.

Finally, the Mr. Linky is only for those who do that week’s project. I do check and when I find a link with no apparent project, I delete it. Sorry, but I really want the links to just be for projects so they are an easy resource for readers.

+++++++

The theme for next week’s Unplugged Project will be:

Sand

Have fun!

Insect - Cricket Chirping/Musical Sticks (Weekly Unplugged Project)

By , August 31, 2008 9:08 pm

My stepmother, who always enjoys our projects, recently sent my children a subscription to Family Fun magazine because she thought they might find some fun ideas there. Well, we did find an idea that sounded pretty cool for this week’s insect Unplugged Project: Cricket Chirpers.

Supplies: 1/2″ wooden beads, wooden skewers, and glue (the article called for “tacky glue” but not being crafty enough to know what that was, I used carpenter’s wood glue):

First, as suggested by the magazine, I cut the pointy ends off the skewers to reduce the chance of injury.

Next, the children threaded 15 beads onto the skewers in any pattern they wished.

My 2 year-old had fun threading beads too. For her, I stuck a lump of playdough onto one end of the skewer so she wouldn’t get frustrated by beads falling off:

She eventually tired of threading and unthreading beads and branched out into sticking the beads onto the lump of playdough:

This turned into an all-out playdough session (one of her favorite things):

After each child had made two sticks, I glued the two end beads with the carpenter’s glue. It turned out to be a bit fiddly and messy, so I think it was a good thing that I decided to do this step myself.

We let the glue dry for several hours, and this was the result:

When rubbed together, the sticks are supposed to sound like crickets. Well, they didn’t sound much like crickets to me. My husband agreed. I thought maybe they sounded more like cicadas on a night full of general, random insect noises. I asked my husband…he closed his eyes, concentrated, and said…”No.”

They do however make cool instruments to add to any musical instrument collection. Sorry about the crickets though.

Why don’t you try it (very easy project) and let me know what you think!

++++++++++

What did you do this week for the Unplugged Project theme of insect? If you did an insect project this week, then please put a link to your project in Mr. Linky.

A few linking pointers:

  • It is best if you link to the actual project post, not just your blog in general, that way people will always be able to find your specific project easily.
  • Also, if you did not do the project, please don’t link. Mr. Linky is for project participants only, not for general links to blogs or stores, etc.
  • Finally, I have decided that I will leave a Mr. Linky open for only two weeks. After two weeks I will disable it so that no new links can be added, but all the existing links can still be followed. This will give everyone two weeks to add their link, but will guard against spam links being added to old Linkys that I no longer monitor.

++++++++++

The theme for next week’s Unplugged Project will be:

Soft

Have fun!

Hot - Edible Sugar Science (Weekly Unplugged Project)

comments Comments Off
By , August 11, 2008 7:19 pm

Finally, here is my hot post that disappeared into the ether last night. Thanks so much to Julie K in Taiwan, Angi and Nature Mama for having the brilliant idea of emailing me the post from their Google Readers. That saved me at least an hour of rewriting! I was so down on computers this morning, but this evening I am uplifted by the fact that three people I have never met in “real life” can help me out! Thank you!!! Now, on to the post:

++++++++++++

The theme for this week’s Unplugged Project was hot. Finally, we managed to get back on schedule and do it, although we broke away from our usual craft project and went in a more scientific direction.

While away this summer, I found a number of good books in my Dad’s favorite thrift store (he’s a packrat too). One is called Science Experiments You Can Eat by Vicki Cobb (more about the book at the end of this post). While we were trying to come up with hot ideas, my 7 year-old daughter picked up this book and wanted to choose a food-related project. We decided on Caramel Syrup: Sugar Decomposes from the Kitchen Chemistry chapter.

Older children will find this scientifically interesting and fun to do. Younger kids will enjoy the end result!

The goal of the experiment is to teach about chemical compounds and how they can sometimes be broken down into completely different substances. Although I always liked science in school, I am not a chemist so forgive me if I am not 100% perfect in my description.

Since I am a terminal nerd, I didn’t trust the book’s very simple explanation, and actually researched sugar and how it decomposes. I learned that sugar and its breakdown process is rather complicated. (If the mysteries of caramelization keep you awake at night, then read this.)

I tried to keep it 7 year-old simple and explained to my daughter that sugar is actually carbon and water fused together. When you heat sugar, it breaks down into its original carbon and water elements. I showed her the scientific formula for table sugar (sucrose): C12H22O11 . She already new that H2O was water and could see that in the formula. After I explained that C meant carbon, she saw the carbon and water in the formula.

Heating the sugar would cause it to become watery (the release of the water) and dark (the carbon). It would no longer really be sugar.

What we needed - sugar, water, a heavy frying pan:

First my daughter poured half a cup of sugar into the frying pan:

We heated the sugar over medium-high heat and my daughter stirred it:

After about 5 to 10 minutes, the sugar started to melt:

As my daughter continued stirring, the sugar melted further and began to darken and become very watery:

Finally it turned “straw-colored” and we had transformed our sugar into a new substance - caramel. We turned off the heat and slowly added half a cup of water in order to create a runny, edible solution. I did the pouring as the caramel was so hot that it steamed and spattered:

The shock-cooled caramel formed a brittle sort of candy-lump that we just had to taste:

My daughter continued stirring the mixture on low heat for about another ten minutes - until the big caramel chunk dissolved into a solution:

This is what we ended up with: a delicious carbon-water mixture that we ate over ice cream!

++++++++++++

If you haven’t heard of Science Experiments You Can Eat and you have scientifically-inclined children (or you homeschool), you might want to check it out of the library. Ours is an old version (1972), but the new one is supposedly revised and updated. I haven’t seen the new one, but our book has the following chapters about the science of food: A Kitchen Laboratory; Solutions; Suspensions, Colloids, and Emulsions; Carbohydrates and Fats; Proteins; Kitchen Chemistry; Plants We Eat; Microbes; and Enzymes.

+++++++++++++

If you did this week’s hot Unplugged Project, please put your link in Mr. Linky below so we can all find you. If you didn’t, please read how to join in, and consider doing next week’s project.

+++++++++++++

Next week’s Unplugged Project theme will be:

Trees

Have fun!

Blog Widget by LinkWithin

Panorama Theme by Themocracy